
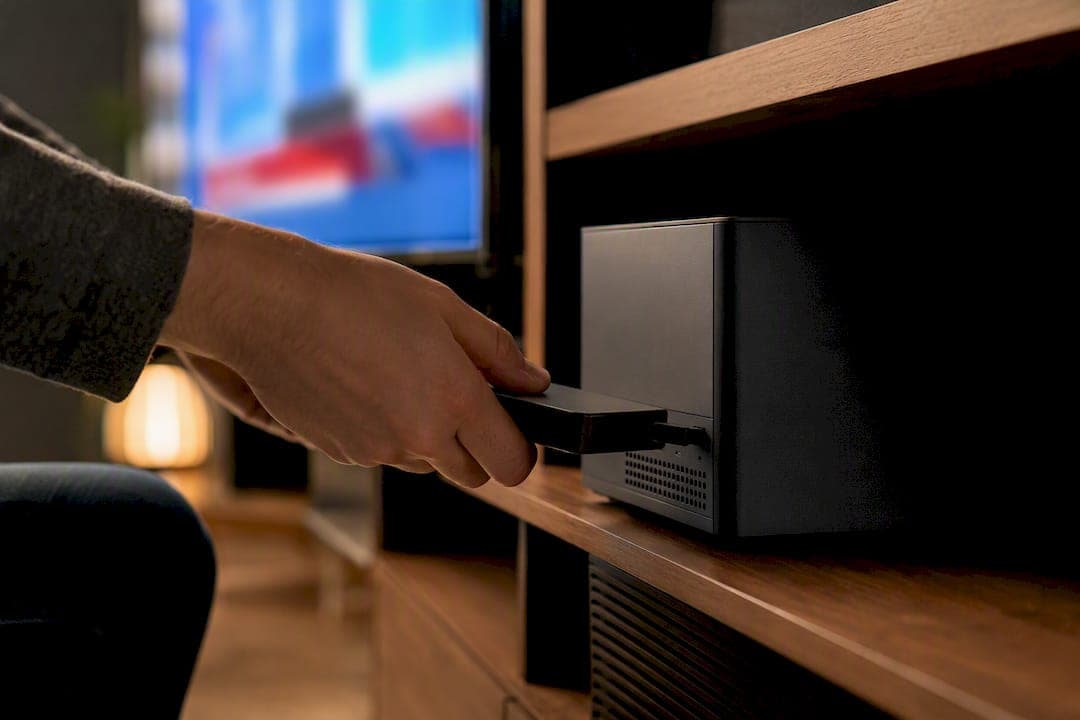
You can reliably record IPTV programs using a player with native stream-copy recording, a desktop tool like VLC or ffmpeg, or a small home DVR server. For scheduled, hands-off recording, go with an Android TV recorder like Nightmare TV or Lynvizo, or a Docker-based DVR like GridStreamr. Skip screen recording as your main method. Always run one short test recording before trusting a scheduled job with a game you actually care about.
TL;DR:
- Native stream copy recording apps like TiviMate, Nightmare TV, and Lynvizo reliably save videos without quality loss, while screen recording often results in quality degradation under load.
- For scheduled recordings, use Android TV boxes with sufficient storage, set proper recording folders, and add padding to avoid missing live content due to timing drift.
- Storing recordings as transport stream files (.ts) helps preserve quality, with file sizes depending on resolution, and proper file naming and rotation prevent storage issues.
- Testing setup and permissions before recording essential content minimizes silent failures, and wired connections improve playback stability and recording success.
- Recording DRM-protected streams is typically impossible with standard tools, and capturing from unauthorized sources or sharing recordings commercially poses legal risks.
Table of Contents
- Which method actually captures the IPTV stream?
- How do I set up IPTV recording on my device?
- Where should you store recordings and how big will files get?
- How do you schedule IPTV recordings without missing the start?
- How do I know my IPTV recording actually worked?
- Is it legal to record IPTV programs for personal use?
- Can you record encrypted or DRM-protected IPTV streams?
- Author notes: a practical default setup
- Need help getting recording set up on your device?
- Where to read more on tools mentioned here
- Sources
- FAQ
Which method actually captures the IPTV stream?
Not every "recording" app does the same thing under the hood, and that difference decides whether your file looks crisp or looks like it was filmed off a TV screen with a phone.
The gold standard is direct stream copy: the app pulls the same data packets your player uses to display the picture and writes them straight to a file, with no re-encoding. Quality stays identical to the source, and CPU load stays low because the device isn't doing any video processing math. This is how TiviMate, Nightmare TV, and Lynvizo handle their recording features, and it's also what ffmpeg does with a simple copy command.
The alternative, screen recording, captures whatever is being displayed on screen and re-encodes it in real time. Tools built for this, like OBS Studio, are excellent at what they're designed for, gameplay capture, tutorials, streaming, but that real-time encode pipeline pushes CPU and GPU usage up and can degrade quality under load. OBS documentation is upfront about this trade-off. For catching a hockey game without dropped frames, it's the riskier choice.
Here's how the main options break down:
- Native app recording (TiviMate, Nightmare TV, Lynvizo): easiest path, schedules straight from the EPG, usually does a clean stream copy.
- VLC on desktop: simple, free, good for one-off recordings when you don't need automation.
- ffmpeg: the technical option, scriptable, low overhead, exact stream copy, and the backbone of most server DVR tools.
- Server/DVR solutions (GridStreamr, IPTV-Recorder, iptv-recorder): centralize your schedules, dump files to a NAS, and let you manage jobs remotely.
- Screen capture (OBS): last resort, only when nothing else works with your source.
If you only take one thing from this section, it's this: match the tool to the job. A quick one-off recording of a talk show doesn't need a Docker container. Missing the third period of a playoff game because your capture method choked under load is the mistake worth avoiding.
How do I set up IPTV recording on my device?
The steps differ by platform, but the goal is the same everywhere: point the app or script at reliable storage and confirm it actually has permission to write there.
On Android TV or Fire TV:
- Connect a USB drive of sufficient capacity for your recording needs or use a box with built-in storage, like an Android TV set-top unit.
- Open TiviMate, go to settings, and set your recording folder to that USB path.
- Browse the EPG, tap the program you want, and select "Record" or "Schedule Recording."
- Note that base-model Fire TV sticks have limited USB OTG support, so a full Android TV box tends to be the more dependable option for this specific job. Our Fire TV buffering guide covers related storage and connection quirks.
On Windows, macOS, or Linux:
- Open VLC, go to Media > Open Network Stream, paste your channel URL, and instead of hitting Play, click the dropdown arrow next to the play button and choose "Convert." Set the output to a file and start.
- For a cleaner, scriptable version, use ffmpeg directly:
ffmpeg -i "STREAM_URL" -c copy output.tsThat-c copyflag is what tells ffmpeg to copy the stream instead of re-encoding it. - Schedule repeat recordings with Windows Task Scheduler or a cron job on macOS/Linux, triggering the ffmpeg command at your desired start time.
- Our VLC and player setup guide for Windows and Mac walks through the network stream steps in more detail.
On a home server or NAS:
- Install Docker if it isn't already running on your NAS.
- Pull the GridStreamr or IPTV-Recorder image and follow its setup wizard, both use ffmpeg or wget under the hood to capture streams.
- Pair GridStreamr's mobile app, or use IPTV-Recorder's web UI, to schedule jobs and mount your recordings folder to a NAS share with plenty of headroom.
- Before your first real job, manually create the destination folder and confirm the container has write permissions. A missing folder is the single most common reason a scheduled recording silently produces nothing.
Where should you store recordings and how big will files get?
Recording formats matter less than people assume, and storage math matters more. When your recorder does a direct stream copy, it typically saves as a .ts (transport stream) file, the raw broadcast format, with zero quality loss. Many tools then let you remux that .ts into MP4 or MKV for easier playback on phones or media servers, without re-encoding the video itself.
Storage adds up fast, and it varies a lot by resolution:
- Standard-definition channels: roughly a few hundred megabytes per hour.
- HD channels: several gigabytes per hour.
- 4K broadcasts: multiple gigabytes per hour, easily.
A three-hour HD hockey broadcast can eat a meaningful chunk of a small drive, so plan your USB or NAS capacity around your actual viewing habits, not just what fits today.
Pro Tip: Name your files with a pattern like YYYY-MM-DD_channel_title.ts from the start. It sounds fussy, but it makes future imports into Plex or Jellyfin painless, and saves you from a folder full of "recording1.ts" files six months from now.
Set a rotation rule too: automatically delete anything older than 30 or 60 days, or move it to an external archive drive. Recorders that fill their host drive tend to fail quietly, not loudly, which is worse.
How do you schedule IPTV recordings without missing the start?
Scheduling from the EPG is the easiest method when your app supports it. TiviMate, Nightmare TV, and Lynvizo all let you tap a program listing and schedule a recording directly, provided your EPG source is properly mapped to the right channel numbers.
For anything scripted, pair ffmpeg with cron (Linux/macOS) or Task Scheduler (Windows) to trigger recordings at set times. Server tools take this further:
- iptv-recorder exposes REST endpoints so you can schedule and manage recordings programmatically, and it supports Docker deployment for easy hosting.
- GridStreamr and Mustarrd both centralize job management so you're not relying on a single device staying powered on.
- A small job database, tracking start time, end time, channel, and filename, makes it much easier to recover from a missed job or check recording history later.
The biggest practical problem is timing drift between what the EPG says and when a broadcast actually starts. Add five to ten minutes of padding before and after scheduled times, and where your recorder supports it, prioritize title-based matching over strict time slots. That single habit fixes more "missing the last five minutes of the game" complaints than anything else.
How do I know my IPTV recording actually worked?
Run a short test before trusting any scheduled job with something you can't rewatch live.
- Record two to five minutes of any channel, then open the file in VLC and confirm it plays back at the right duration and resolution.
- Check that your record folder exists and is writable, this catches the most common silent failure.
- Confirm your device or server stays powered on and connected at the scheduled time; a box that went to sleep won't wake itself for a recording job.
- If playback shows glitches or frozen frames, check your connection stability. A wired connection often resolves problems that Wi-Fi introduces, an issue our buffering troubleshooting guide covers in depth.
- For repeated failures, add more start/end padding, free up disk space, and check server logs or the app's status page for clues.
One overlooked cause of corrupted files: killing ffmpeg abruptly instead of letting it close out gracefully. Scripted jobs should send a proper stop signal so ffmpeg finishes writing the file cleanly, according to IPTV-Recorder's own documentation on the topic.
Is it legal to record IPTV programs for personal use?
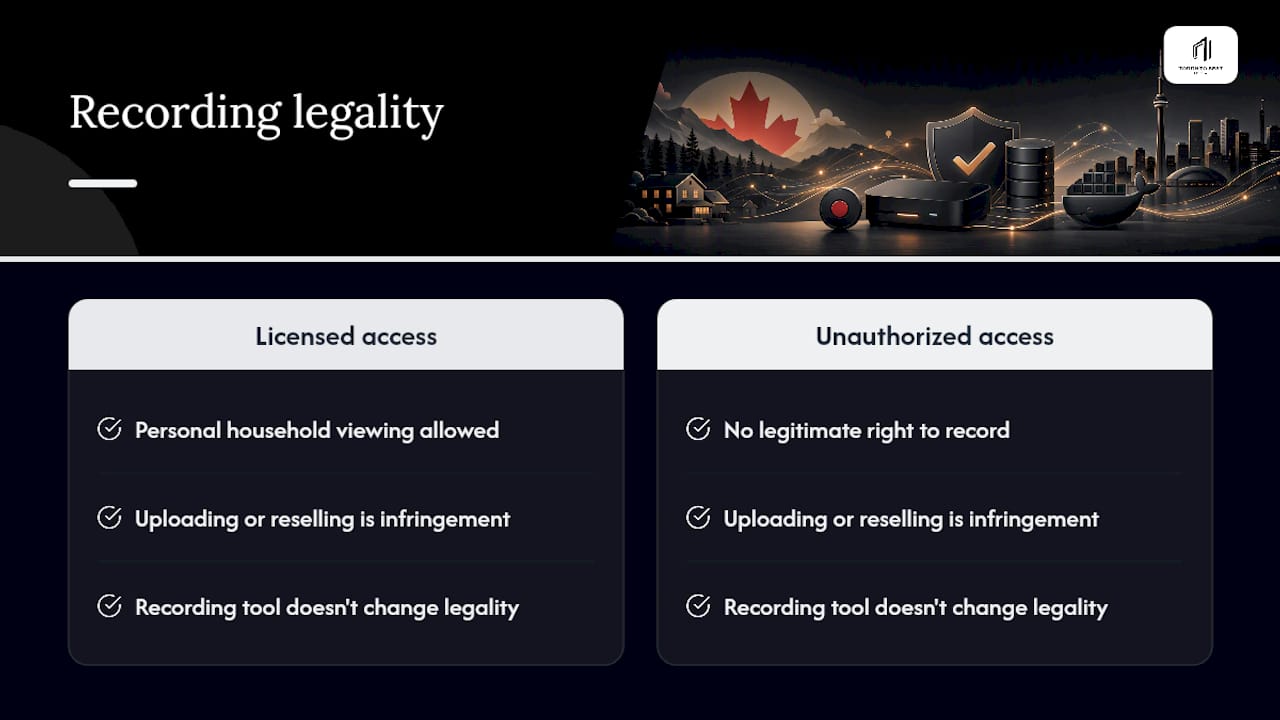
Copyright law generally distinguishes between recording something you're already legitimately licensed to watch for personal, later viewing, and recording content to redistribute, resell, or share publicly. The first is a longstanding practice tracing back to home VCRs; the second raises real legal exposure regardless of what tool you use.
Where things get genuinely complicated is the source of the stream itself. Recording a broadcast you access through a properly licensed IPTV subscription is a different legal situation than recording from a pirated or unauthorized stream, because the underlying right to access the content in the first place is what's actually in question. No recording tool, whether it's ffmpeg, TiviMate, or a Docker DVR, changes the legality of the stream it's capturing.
Redistribution is where the clearest lines exist. Uploading recorded sports broadcasts, movies, or series to public platforms, sharing files widely, or reselling access to your recorded library crosses from personal use into copyright infringement in most jurisdictions, and rights holders for live sports in particular have historically pursued this kind of sharing aggressively.
The practical takeaway: keep recordings for your own household's later viewing, sourced from a service you're actually subscribed to, and you're operating in the same space as decades of home recording practice. Treat any plan to share or resell recorded content as a legal risk you're taking on personally, because it is one.
Can you record encrypted or DRM-protected IPTV streams?
Digital rights management exists specifically to prevent the kind of direct stream copy this article recommends, and that's by design, not an oversight. Premium streaming services and some IPTV providers apply DRM to protect licensed content, and tools like ffmpeg or VLC generally cannot capture a properly DRM-protected stream in usable form, because the decryption keys aren't exposed to the recording software.
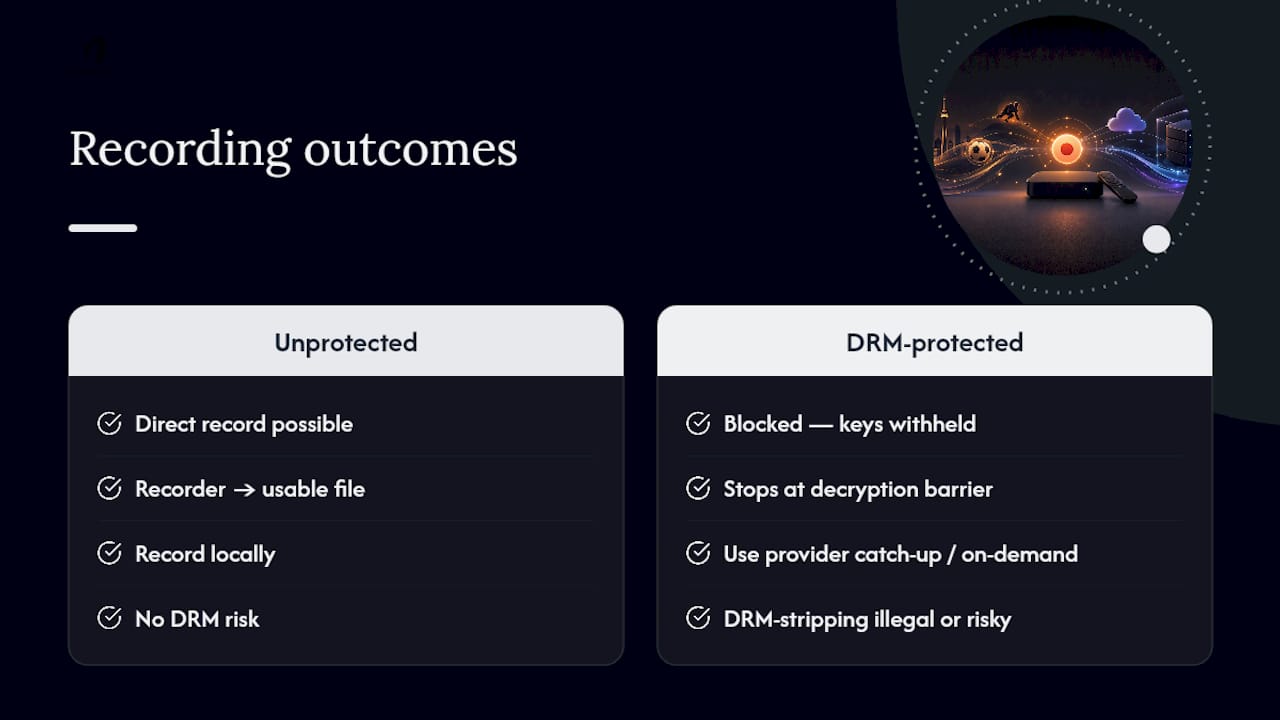
Most standard IPTV playlists you'd use with TiviMate, Nightmare TV, or Lynvizo aren't wrapped in the same DRM layer that, say, a major streaming platform's original content uses. That's part of why direct stream copy works so reliably across IPTV recorder apps in the first place. But encryption varies by provider and channel, and you may hit streams that simply won't record no matter which tool you throw at them.
If a channel refuses to record, resist the urge to hunt for a workaround tool that claims to strip DRM. Beyond the legal risk that carries in most jurisdictions, those tools are frequently unreliable, bundled with malware, or both. The more sensible response is to check whether your provider offers a legitimate catch-up or on-demand version of the same content instead of trying to force a local recording of something built to resist it.
Author notes: a practical default setup
For most households, a small Android TV box running TiviMate handles day-to-day recording well, and a home server with GridStreamr earns its place once you're scheduling across multiple channels or devices. Test any new recording setup on something low-stakes before you rely on it for a game or season finale you actually care about. If your device is giving you trouble, our device setup guides or direct support are worth checking before you assume the method itself is broken.
— Aj
Need help getting recording set up on your device?
Everything above works with your own IPTV subscription, whatever provider you use. But if you're still hunting for a Canadian-friendly service with strong stream quality to record from in the first place, consider a service with edge routing technology designed to cut buffering on live sports like NHL and NFL, which matters as much for a clean recording as it does for live viewing.
Plans start at $15 a month, and the two-day free trial lets you test stream quality on your actual device before committing to anything. If you're not sure how your box or app handles recording folders and permissions, our device-by-device setup guides walk through the same process covered in this article, and our support team can help with configuration questions specific to your hardware. This how-to is independent advice you can use with any provider; the trial is simply the fastest way to see whether Toronto's Best IPTV's stream quality is worth building your recording setup around. Start your two-day trial and put it to the test.
Where to read more on tools mentioned here
For deeper technical reference, check the OBS Studio documentation for screen capture settings, GridStreamr's DVR feature page for Docker install steps, and the IPTV-Recorder and iptv-recorder GitHub pages for scheduler and REST API details.
Sources
FAQ
What's the best format for recorded IPTV files?
Save as .ts during recording to preserve original quality with a direct stream copy, then remux to MP4 or MKV afterward if you need easier playback on phones or media servers.
How much storage do I need for IPTV recordings?
Plan for a few hundred megabytes per hour for standard definition, several gigabytes per hour for HD, and multiple gigabytes per hour for 4K content.
Can I record IPTV directly on a Fire TV Stick?
Base Fire TV Sticks have limited USB storage support, so a full Android TV box with proper USB or built-in storage tends to work more reliably for scheduled recordings.
Do I need special software, or can VLC do it?
VLC handles one-off recordings fine through its Convert function, but for scheduled or automated recording, ffmpeg scripts or a dedicated recorder app like TiviMate work better.
Will recording work with any IPTV subscription, including Toronto's Best IPTV?
Standard IPTV playlists without heavy DRM, which includes typical subscription-based services like Toronto's Best IPTV, generally support direct stream copy recording through apps like TiviMate or ffmpeg.